TABLE OF CONTENT
The Minotaure framework offers a range of Premium plugins.
They are specifically adapted to the needs of your project.
Their complexity places them in a particular category.
FAQ
The Frequently Asked Questions content module allows you to create a knowledge base to cover all your visitors' questions.

The FAQ widget allows you to display a selection of questions by choosing the number and category of filtering. Just like the list of articles, you can quickly provide a specific context for your visitors on any page that supports widgets.
A search area allows visitors to deepen their questioning to access questions that would not be directly displayed.


Map
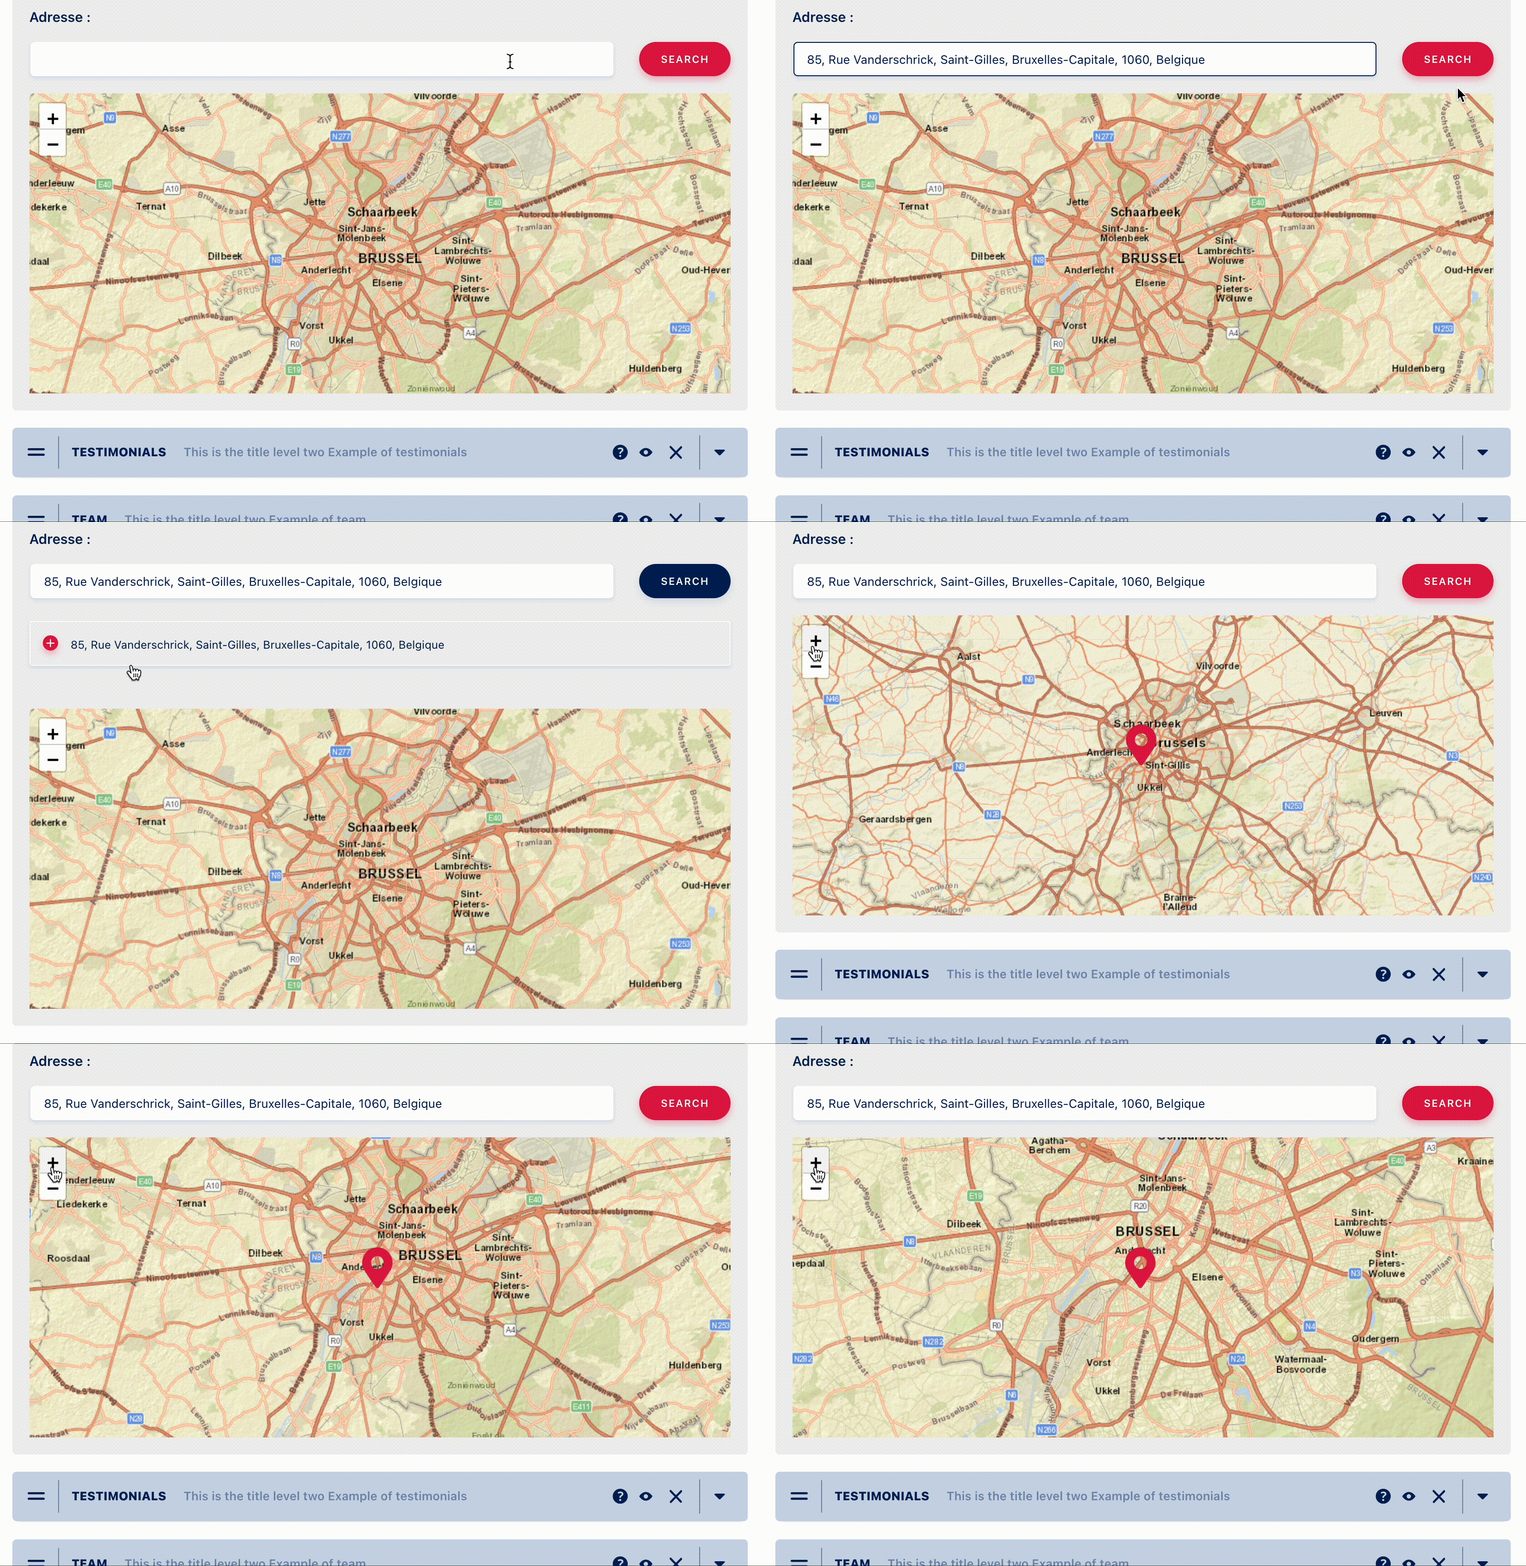
This widget displays a single point on a map (like the company address on the contact page.

The functionality allows the encoding of a unique address which will be geolocated by a call to an external service (OpenStreetMap, Google Map, etc.).

Testimonials
According to its title, this widget gives a chance to speak to real persons!

You may therefore present the testimonials and/or feedbacks of your clients, colleagues or partners depending on the needs of the page.
You can sort the testimonials by categories.
The object is adapted to present 1 or more selected testimonial (just like the articles or FAQ). A title, an image, a description, an organization are available.


Team
This content module allows you to create a presentation page of all the people of the company.

The Team widget will display on a Section page (About us, etc.) a selection of people by offering to display a photo, a name and a short description. The category logic allows you to quickly select a specific group of people (board of directors, administrative team, etc.)


Partners
This module allows the management of (business) partners to be presented on different pages.

This action may be done on a very simple manner (a list of logos), or for a more advanced use (title, logo, description, link to a special page on your website or to their official website).
A taxonomy is proposed that allows you to filter the display of partners according to your needs.


Events
If you organize recurring events, this object allows you to manage your catalog.

An advanced version allows the integration on an external ticketing service, Utick.be for instance). All the sessions available for sale are automatically synchronized on your website.
To help your visitors in choosing the best date, the Events widget uses a calendar logic to show the available slots.


Add an event
Apart from the title and text description, there are several items to be precised, such as the start and closing dates, as well as the address where the event takes place.

Step by step
This one is designed to manage a horizontal timeline.


To add a new step, you can either click on the icon at the bottom right of the current block - this will duplicate the block and its content ; either click on the button "Add a section" in the block below - and fill in the fields Title and Description.


Portfolio


Slideshow
With this one, you may have a dynamic presentation of your content (usually, pictures). The slideshow has a standard horizontal left/right navigation.


After having completed the Title and Description fields, you can add as many sections (= slides) as you want. To proceed, you can either click on the icon at the bottom right of the block (this duplicates the block and its content); either click on "add a section" in the block below.


Tabs
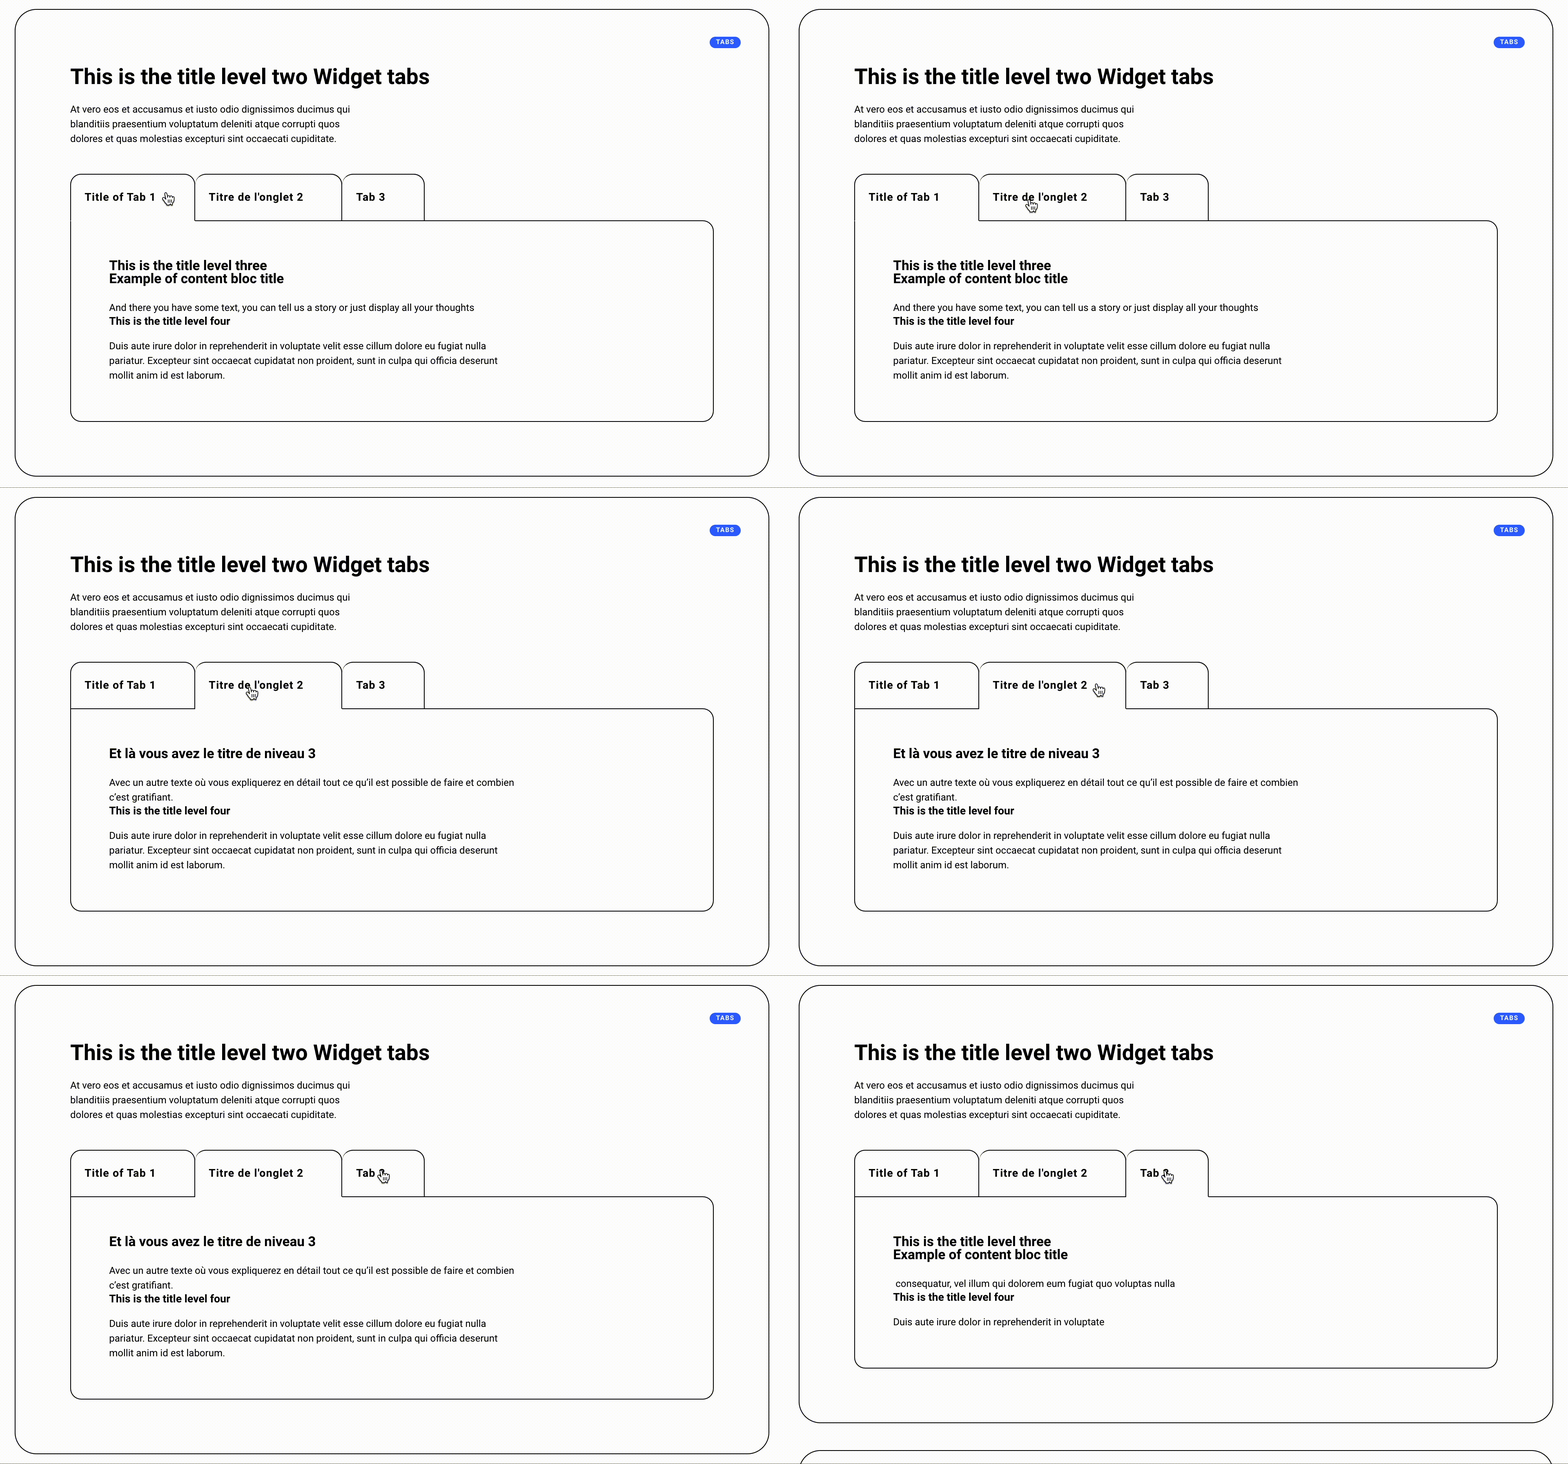
This one allows you to clearly organise your content, thanks to a navigation through several tabs.

When you have completed the Title and Description fields, you can add as many tabs as you want. To proceed, you can either click on the icon at the bottom right of the block (this duplicates the block and its content); either click on "add a section" in the block below.


The title is the part visible on the tab - always visible, even when the tab is closed. The content is only visible when the tab is opened.

Table
The module Table allows you to add a table of static data on your page

When opened, this widget looks like the Content Editor's one, but he's got one special functionality: a button to create a table.
Go to the "table" icon on the top left of the editor's block. In the sub-menu, you can choose the size of your table, how many rows and columns you want.
Click, and then the table appears in the editor's block. Now, you can fill in the cells with the text / data you need. When clicking in the table, a contextual menu appears, allowing you to insert or delete columns and rows.
Give the table a title, and to fill it you have all the editor's functionalities at your disposal. To design the titles of the columns/rows, you have to use the different titles level, also available in the editors's block.

Products
This widget is only used when talking about an e-shop. It's linked to the installation of the 'Woocommerce' extension.
First of all, you need to create all the products of your catalogue - go to the left sidebar of your dashboard. For each one, you'll set a name, a sales price, a description, maybe some technical details, availability or delivery info, etc.

When you have all your products updated, then you can create the page.
For this, insert the Products widget. Like all the other ones, he's presented with a Title and a Description fields. Below these information, you con choose how the products will appear (alphabetical order, increasing order, chronologically, etc.)
Finally, precise how many products will be displayed on the page - you may prefer doing the selection yourself, if so, then click on the "manual" tab and choose the products in the list.

Click on "Update" on the right of the page, and let's have a look at your work!
Facts & Figures
This widget presents key figures, with just a few words to explain them.
These are rewarding data, visually highlighted because of their importance, and also to avoid long useless texts.

Like the other modules, it starts with a Title and Description fields.
If you want - it's not compulsory yet - you may add a link to another page (Read more, All our projects, etc.)

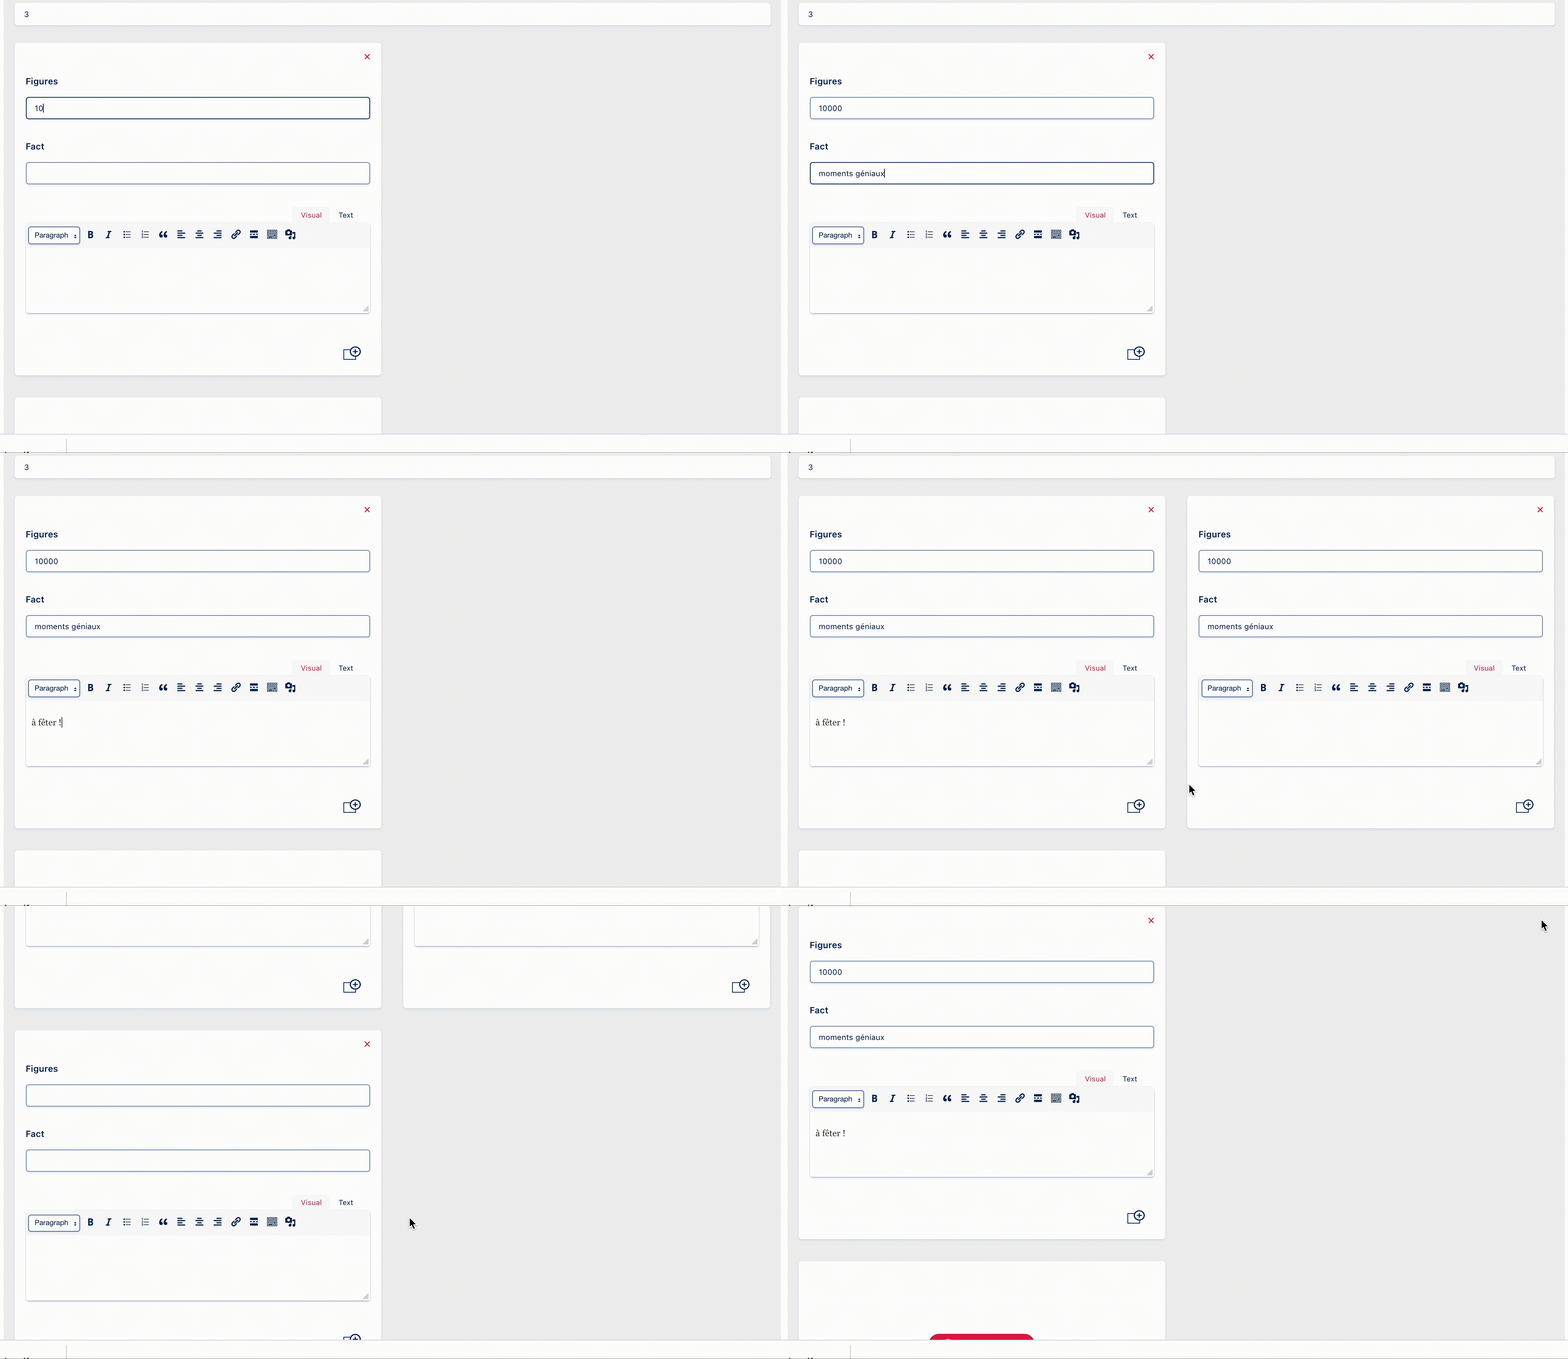
The most interesting part of this widget comes now: choose how many key figures to be displayed in a row (default number is 3, you may go up to 6).
Then, add your data! Two options for this:
- duplicate the block - click on the bottom right icon. The figure and its description will be duplicated, but not the longer description
- click on the below button "Add a section"

Complete the Title and Description fields. If needed, you may add a few more lines by editing the field "Description" below.
Click on the small red cross at the top right of the block to delete it.
Do not forget to save your work, and have a look at it!